This origami gift bag tutorial may have quite a few steps but it's honestly not too tricky and looks so lovely when finished, your friends and family will be so impressed! It's also a great way to wrap small, awkward shaped gifts.
Here is my step by step guide...these gift bags will be 5.5cm (w) x 5.5cm (d) x 7cm (h) once finished.
1. Start with a piece of beautiful wrapping paper (preferably one of my designs) 20cm x 20cm in size. Place it print side down on a table and fold it in half diagonally to from a triangle shape, crease hard with your nail, unfold and repeat again the opposite way. You should now have a square piece of paper with X fold lines.

2. Fold in half to form a rectangle shape, crease hard with your nail, unfold, turn 90 degrees and repeat again the opposite way. You should now have a piece of paper with star shaped fold marks.

3. Gently push from the underneath, at the centre point of the folds to bring it upwards and ease the paper into a triangular shape with two layers, folding along the diagonal lines.

4. Place the triangular shape down on the table with the tip down and fold the tip up a third of the way of the triangle shape.

5. Fold the top corner of the right flap across, meeting the right fold of the triangle tip. Do the same with the top left corner.

6. Fold the left flap back on itself, in half.
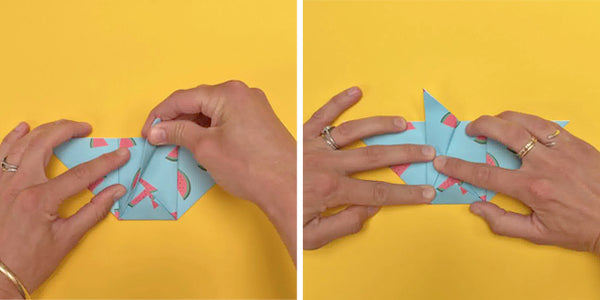
7. Turn the shape over and fold the right side so the vertical line meets the underneath one. Do the same with the left flap and then fold it back on itself in half.

8. Gently unfold the bottom tip of the triangle and carefully pull apart the sides to open up the shape. Use your fingers to push out the bottom 4 sides of the gift bag and pinch the fold lines between your fingers to hold the shape.
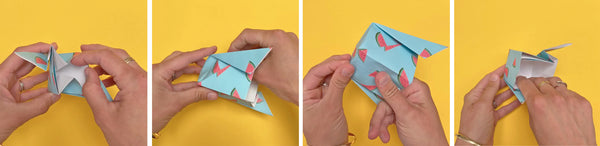
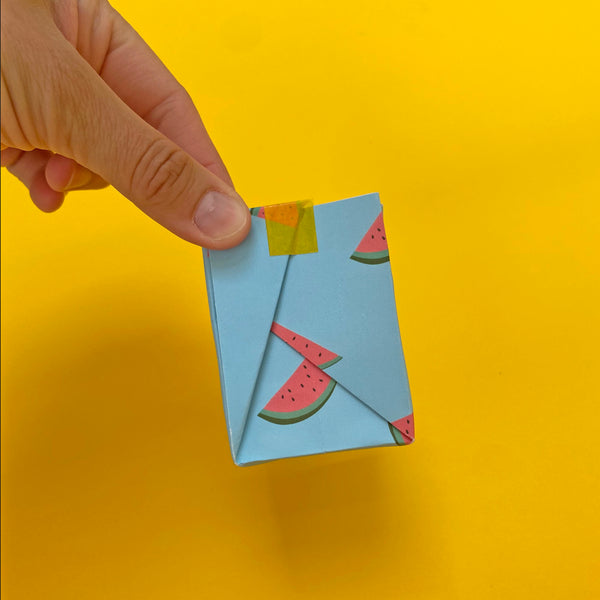
9. Fold over the two top flaps and crease hard, find the pocket in the walls and tuck inside.

10. Now you can pop a little piece of tissue paper in the bottom of your bag, drop in your small, awkward shaped gift and seal the top with a piece of washi tape.


Leave a comment