Why is it that some people's gifts always look so perfectly wrapped whereas yours, not quite so perfect...
If you've bought the perfect gift and got some lovely gift wrap (possibly some of mine!) then you don't want the final result to let you down.
Well luckily for you, there's no real secret it's just being methodical and following the same few simple steps every time. I promise you anyone can make their presents look amazing!
In these pictures I'm using some of my luxury cherry blossom gift wrap with the matching stickers and gift tag. If you're going to make the effort then why not go the whole way!
So here we go...
The most important part to get right is cutting the paper to the correct size for the present. This is the part where I've ended up going wrong in the past but if you follow these steps then you'll nail it every time, no more wasted paper!
1. Lay the paper out face side down and place your gift on top of it in the centre.
Hot Tip: You'll see that I'm wrapping a box here. Boxes are the easiest things to wrap and look the most pleasing when finished so if your gift is loose then try to find a suitable sized box to put it in.

2. Lift one side of the paper over the long side of the present and down the other side. Then mark your cut line about 5 cm further along the paper to give you some overlap when wrapping, then cut the paper. Now the paper should wrap nicely around the present and create a tube that is longer than the present.

3. Now to measures out the flaps on the ends. This is the part where many people go wrong! Lay the paper flat again and this time fold up the bottom of the paper along one of the short sides of the present. Position the present so that the paper reaches just past half way up the present.
4. Now fold up the paper on the other end of the present and mark the point just over half way up the present. Cut the paper at this mark. Now the paper is long enough to wrap all the way around the present and wide enough to create two flaps on either side of the present. That's the hardest part done, woohoo!

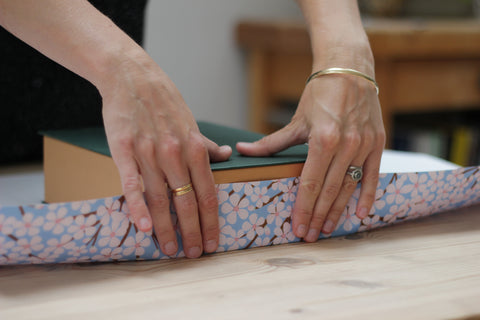
5. Fold the sides of the paper up around the present making sure you keep it taught. Pull one side down and press along the top of the present to form a crease in the paper. Now fold the other side down, crease that edge too and use one of your stickers to stick it down. If the present is quite long then you can use two of your stickers evenly spaced along it.

6. At one end of the present fold in the two sides of the paper and press down along the sides to crease the paper. This helps keep the paper in place while you fold the flaps down. Thicker paper (like my lovely luxury wrap I'm using here) makes this much easier as it stays where it is after you've creased it.

7. Now fold down the top flap of paper and push along the edge of the present to crease it.

8. Fold up the bottom flap and crease that too. Use a sticker to hold the two flaps together. Repeat these last three steps for the other end of the present to stick that end down too.

9. Flip your present over and use a final sticker to attach your matching gift tag. Congratulate yourself on wrapping a beautiful present!

So there we go. Hopefully you'll find this step by step guide useful to refer back to next time you really want to impress someone with your gift. Of course to really show off you could add a lovely luxury bow to the wrapped present. I offer these in three lovely colours alongside all my gift wrap.
Here's a little video I made taking you through how to tie to perfect bow on your present.

Thanks for reading and as always please tag me in any pictures you upload to social media as I'd love to see your beautifully wrapped presents!
Lot of love,

Leave a comment